
An Easy Guide to Cleaning Ford F-150 Headlights
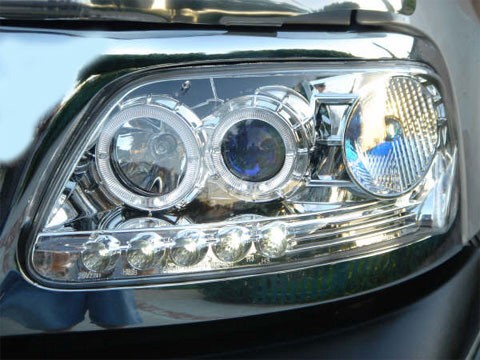
If you own a Ford F-150 (or any of the Super Duty models including F-450, F-350, and F-250) you might notice that over a period of a couple of years, the head lights will start to turn a yellow color or become dulled. Whilst it might be easy to quickly go online and purchase a new set of F-150 head lights, you could save yourself the money by following this short guide which details the best way in which to get them look nice, new, and shiny again.
You will need to purchase a cleaning kit to do this, but it will be infinitely cheaper than buying a new set of lights and the best kit that I can recommend is called the Flitz Kit which is available on the Amazon website. The Flitz Kit comes with a ball then gets attached to a drill piece to you can buff properly plus Flitz Metal and Plastic Polish in a tube. Once you have this kit, or at least something equivalent you can get to work as follows.
Step 1 Masking Tape Around the Paintwork
Mask around the head lights over the paintwork of the surrounding area. You should use a light abrasive masking tape which will not damage the paint. By masking the area you will prevent damaging and any scuff marks whilst buffing. Scratch repairs on a Ford F-150 can be expensive to repair so dont do anything until you have this part right.
Step 2 Circular Motions Using Wet Sand Paper
The Flitz Kit came with 1500 gradient sand paper make sure you soak this in a bucket of warm water. Once soaked for about 30 seconds you can start to sand over the plastic of the head light but make sure you dont press to hard, this really should be an almost caressing and circular motion. Do this for around five minutes and then switch to 2500 sand paper and repeat the process. The sand paper should always be wet so dont let it dry out.
Step 3 Dry Off and Polish the Head Lights
Once sanded you will need to dry the head lights off using a dry towel, and then will have to polish up the work with a micro-fiber towel. Use some of the Flitz Kit polish (a pea-sized amount on the towel) and again work over in circles similar to how you worked the sand paper in.
Step 4 Buff the Lights Using the Ball and Electric Drill
When you are at the point where you are happy that the lights are polished well enough, you can now buff them up. Using an electric drill piece, attach the buffer ball. Make sure you have the drill set to no more than two and a half thousand RPM because anything more could cause damage to the plastic. After just sixty seconds of buffing with the drill, you will see an amazing difference with your head lights which should be back to their former glory.
More Information: This how to article was brought to you by Bob Simmons who is one of the team behind this independent Navigation DVD website that offers links to the best deals on GPS map software upgrades for all model of car. Bob drives a Ford F-150 himself which is equipped with the latest Ford Navigation Update more information of which can be seen on these links.