
South Africa Tour
South Africa Tour
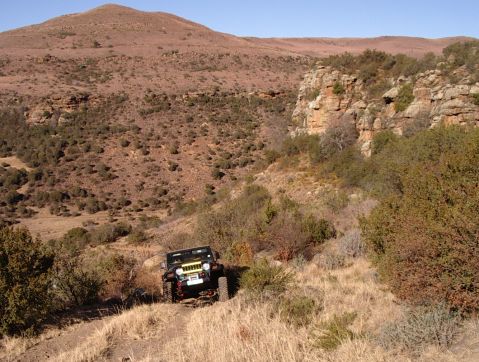
Jeep Wrangler TJ
MODIFICATIONS THAT WE HAVE DONE TO A 2000 MODEL TJ JEEP WRANGLER AUTO:
OWNED BY RONNY RENGERS & SIMON MORRIS
THE ROCKCRAWLER………………..ATLAS 2
4.3 to 1 ratio.
A special cross plate had to be made, to hold the 4 litre fuel injection engine and automatic gearbox in place, while we were working on the transfer box, we used a piece of channel iron, we once again used the coil spring clamps and then some angle iron and then supported the rear underbelly of the auto box and then removed the underbelly protection plate which serves as the rear cross member for the auto box, do not forget to also remove the four nuts on the gearbox mounting.
Once this plate was out of the way, the battery was disconnected all the electrical wiring plugs were disconnected, (please note, you must remove one of the battery terminals, with the ignition key switched off, before you disconnect any wires.) This is just for safety. Then we removed the center consol in the interior of the Jeep; this is between the seats to be able to remove the shifter lever from the floor support.
Once we had loosened the four bolts holding the rear drive shaft to the rear Dana 44 diff flange. Out came the drive shaft. Then the bolts holding the transfer case to the rear of the auto box were removed and out came the transfer case, you do not have to drain any oil from either the auto box or transfer case. You do not have to have a gearbox jack, due to the transfer case not weighing too much. We then cleaned the mating surfaces, removed the old studs from the old transfer case and then refitted them into the correct holes on the Atlas 2, use some thread lock liquid on the threads, you have five different positions angles that you can fit it, using a little Wurth red silicon on both surfaces and allowing it to dry for five minutes, we then fitted the new Atlas 2 transfer case onto the rear end of the auto box. If you are not sure what angle or holes in the Atlas to use then you must have a dry run to see if the transfer case will fit in the correct angle. Without the 1 body lift you would not be able to fit the Atlas 2 at the top most angle like we did. Giving us more ground clearance. The 1 body lift gave the Atlas more space and it was actually easier to make the adjustments for the twin shifting levers.
Then the rear Dana 44 diff flange was removed and a special heavy duty flange fitted, we also removed the Atlas 2 rear drive shaft flange and fitted a multi hole flange for the special double cardan joint universal the front has one fitted standard from the factory and heavy duty drive shaft which we ordered from Tom Woods in America. The front drive shaft we had shortened by Bills Prop shaft Center in East London and then refitted it to the Dana 30 diff upfront.
Then a Richmond Trax Lock was fitted in the Dana 44 rear diff and a Trax Lock in the front Dana 30, these are also known as auto lockers, first you have to remove the front and rear side shafts, see workshop manual for details, drain the oil and then remove the diff covers, with the rear diff we had to remove the crown wheel and carriage due to the main pin that locates the sun and planetary gears, would not slide out past the crown wheel teeth for some reason, the fitment of the auto diff lock in the rear, can also be done without removal of the crown wheel, this was not difficult at all. Concerning the front fitment of the auto diff lock we were lucky enough to do it in place without removing the crown wheel, out came the pin, sun and planetary gears then in went The Trax Lock, section by section, once again the instruction manual shows you what to do. Take care of the special little springs, use a bit of grease on them to keep them in place.
Once we were happy about the auto lockers and the sealing surfaces were clean enough, sealant was once again used; we fitted the inspection diff covers. A mechanical locker would be better for the front diff, as sharp turns are very difficult to negotiate, here we disconnect the front wheel drive. It would be better to disconnect the front diff lock.
Ronny has a 55 ton hydraulic press and thus when we had fitted the new heavy duty universal joints to the Warn free floating heavy duty axle side shafts, we inserted the side shafts into the front and rear axle housings, on the front side shafts you must first insert the inner tube seals these tubes prevent dirt, mud and water from entering the front axle housing, the older standard side shafts have a black plastic collar that serves this purpose, they will not work on the new shafts, the old shields are too small. The Timken bearings and hubs were greased with bearing grease and The Warn Hub Locks front and rear were fitted, then the front brake discs, pads and calipers and rear brake backing plates, shoes and brake pipes reconnected and brake drums. The wheels were then fitted, please note we had to also drill a hole through the flat flange part of the locking hub and brake drum which was threaded to screw the hub in place, as normally only the wheel nuts hold the locking hub in place, thus if you get a puncture be careful when you remove the wheel, as the locking hub will also come off allowing dirt to enter the bearings, this grinding paste will rip apart the workings in a short time.
Simon then manufactured a front bull nose protection plate using 3.5mm steel plate, that we incorporated the special winch plate that the Mile Marker 12 000 lbs hydraulic winch bolts through into the already threaded holes in front of the chassis. We used longer HT bolts to hold the winch, bull bar, winch plate, bull nose and tow hooks in place. However we did consider enough protection for the steering box due to the hazard of rock damage. We were also able to incorporate the wireless remote into the system, thus the aim is with the help of the Companion walk n talk radios, Simon would be able to control the winching operation by remote and be able to stand safely away and be in contact with Ronny who would be driving his Jeep, Ronny bought himself a set of ear phones that he plugs into the Companion radio and thus is hands free to control the steering. There is also the correct electrical socket available for the normal wire remote.
Other modifications were; a security consol was fitted, Simon made up heavy duty anchor point for the rear that a bow shackle can be attached onto it to make a tow point, we fitted one of those Mopar tow bars, but first modified it by fitting High Lift jacking points, so we can insert the extension for the High Lift. Special jacking points were also made for the front bull nose. We had to buy another new Mickey Thompson Classic 2 rim to use as a spare, due to the fact that the original alloy rim would not fit the Warn hubs, we managed to get the rim and Mickey Thompson HP second hand tire from After Market Sales, Haynes du Plessy’s, Haynes was also very helpful, he also fits chassis lifts to different vehicles, made by Pro-comp. Remember when a person does these modifications when you order any parts instruction manuals come in the package which explain in detail what to do, however we also ended up getting confused especially with the fitting of the hub locks at the rear, we were not sure what went back first, but after contacting our supplier, we found out that the bolts that hold the bearing flanges in place, their heads have to be in the correct position, in other words the flats of each head have to be against the round part of the flange other wise you could not turn the wheel bearing hub, there was not much clearance between the flange and the head of the bolts, a recess should have been cut into the flange to give more clearance, thus with the correct torque that they state we found that they did not all line up so you just had to use your common sense and advance some a little.
Finally the morning arrived when it was time to test drive the Jeep , but first of all we greased all the necessary points, re checked all the oils, we used the grass pavement across the road from Ronnys home to test the Atlas 2, to see if the operation was correct, that the twin shifting levers were in their correct position as they are threaded where they connect to the two shafts on the Atlas. Thus we first locked the front hubs, selected low range for the rear and then low range for the front, the Jeep had to be moving slowly forward to make these selections, with The Atlas 2, a person can decide which gears to select, due to the different options available, for example, you can select low range for the front wheels only and put the rear wheels in neutral or you can select high range for the rear and put the front wheels in neutral, you can also select low range, but not high range for the front alone. To change from high to low, you have to be on a slow downhill.
Everything worked accordingly to plan, we did not have to make any adjustments, but please remember you will have to cut some of the floor pan away to give the rear shifter more selection free play, we once again used the plasma cutter for this small job, also you will have to file some of the plastic consol away when you refit it back between the seats, otherwise the rear shifter will touch the consol.
Page 1-Page 2- Page 3